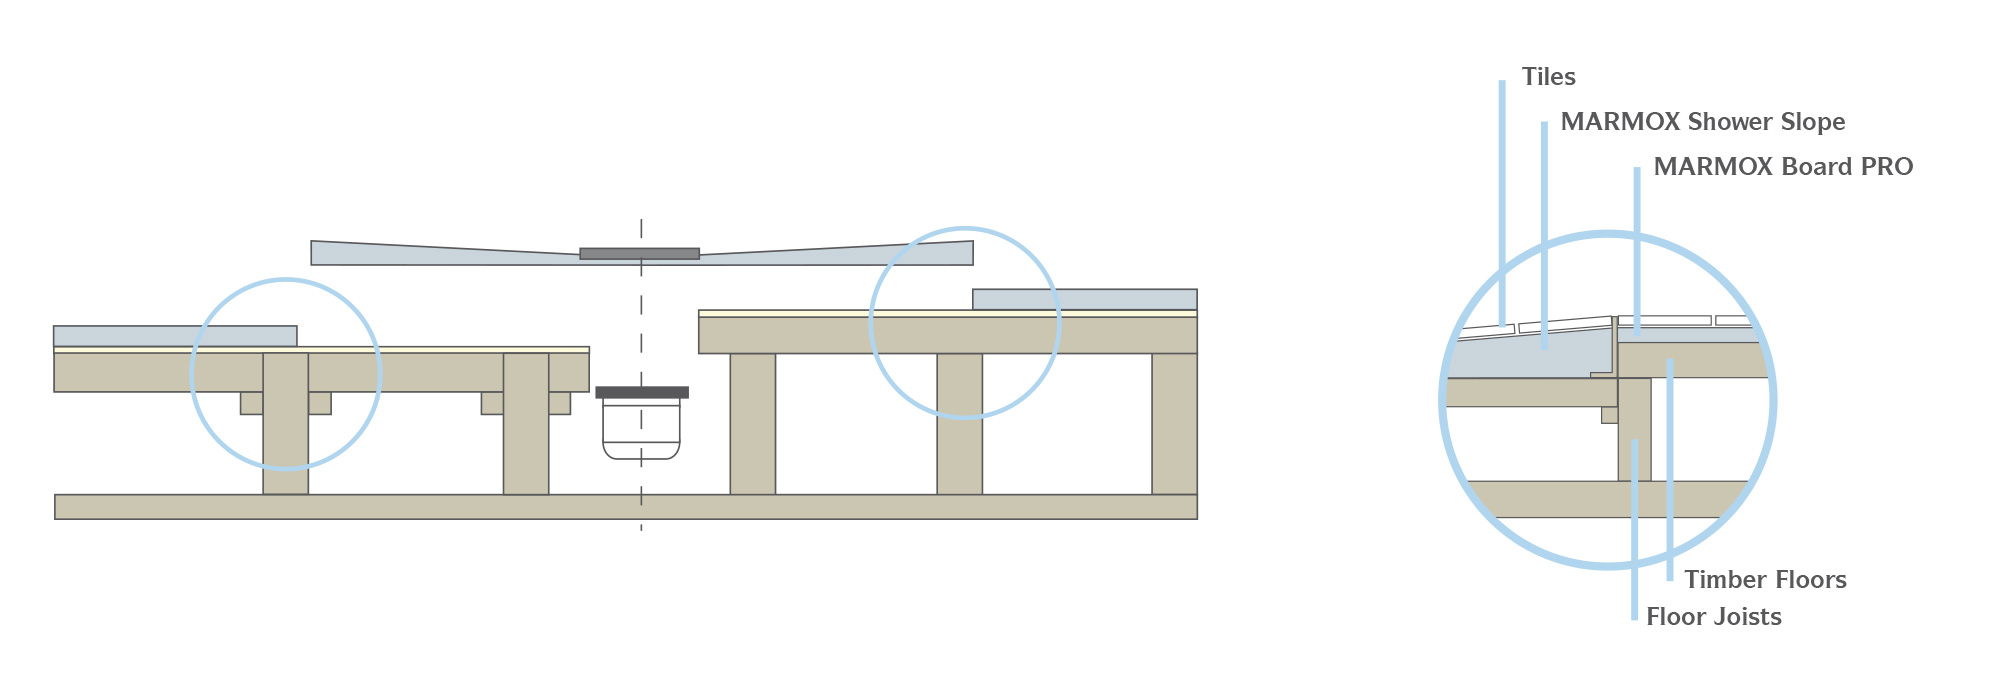
MARMOX Shower Slope
Installation
MARMOX Shower Slope can be installed on both timber or concrete surfaces. It is important to fully adhere MARMOX Shower Slope horizontally to a loadbearing surface.
Installation on timber floors
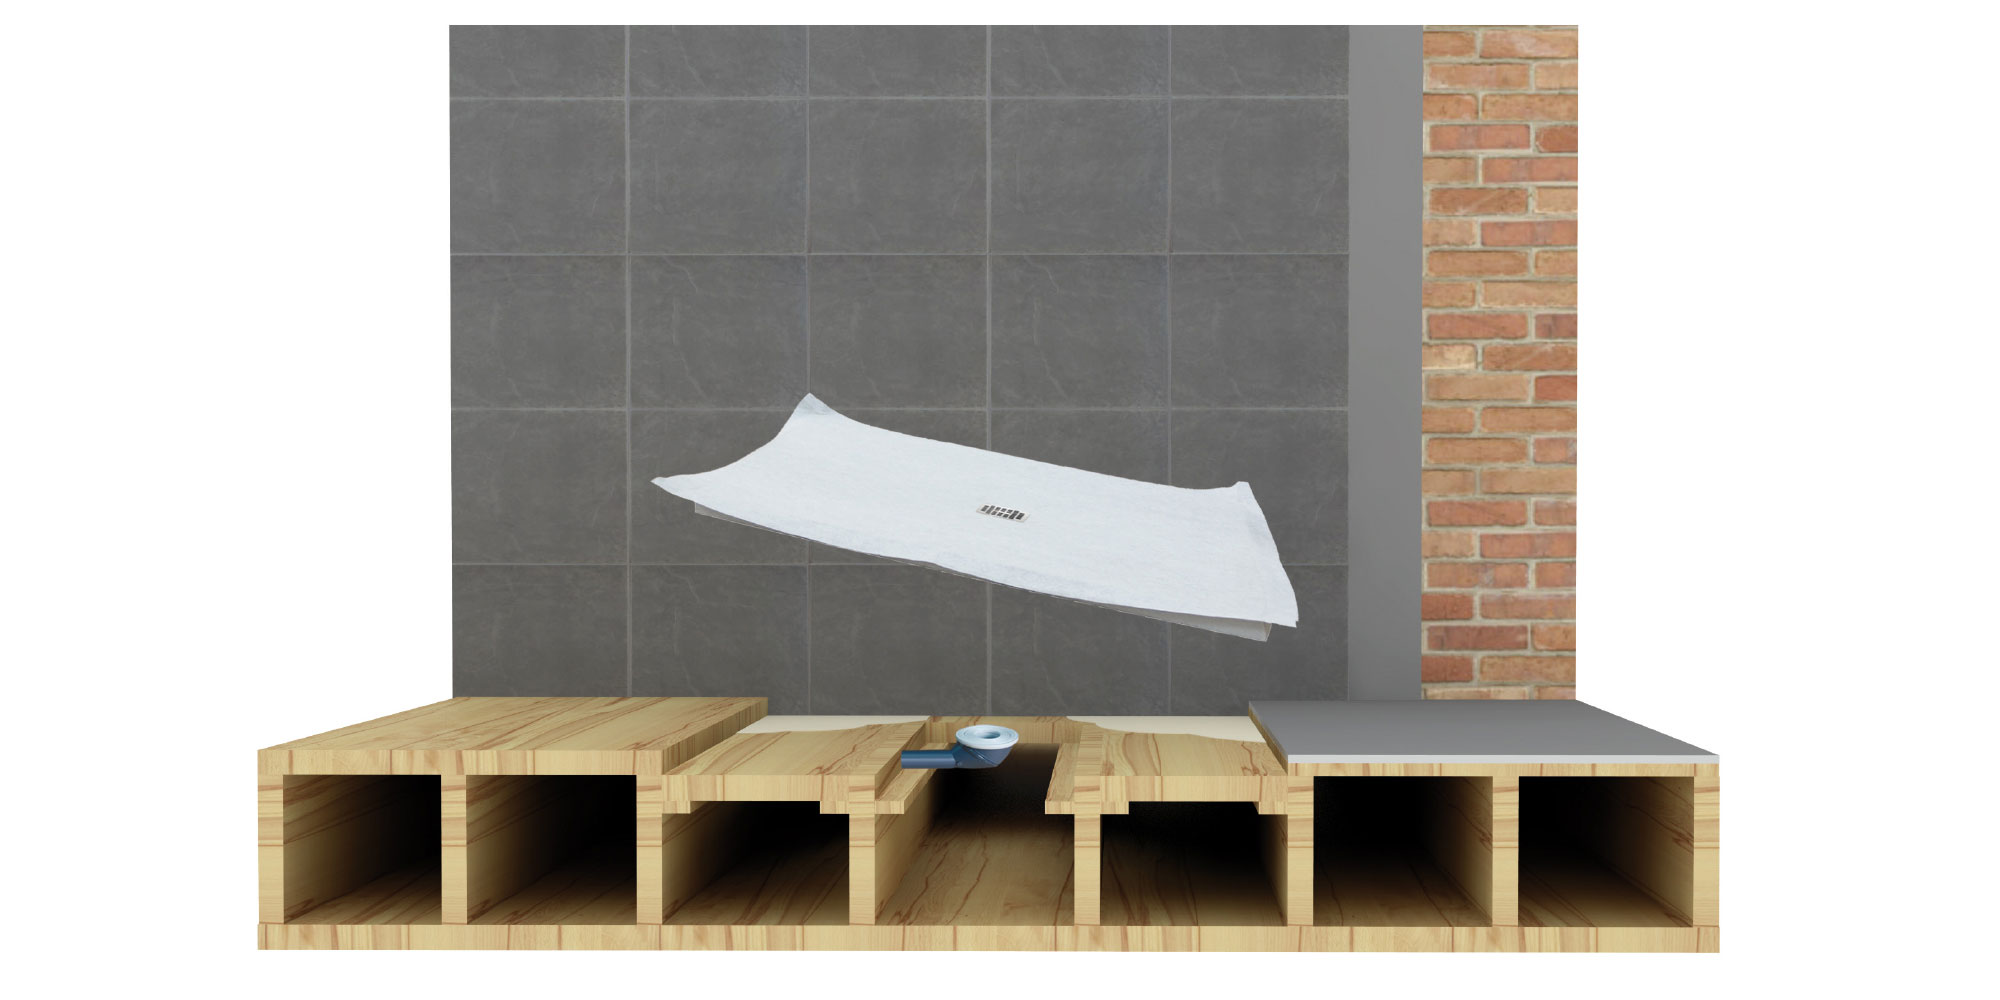
01. A successfull installation requires a clean surface that is free from dust, grease, loose coatings and other impurities.
MARMOX Shower Slope can either be installed on an existing floor or integrated into the flooring structure, creating a flush and barrier-free surface. Please note that an eventual change of statics in the flooring structure requires a new static test.
02. Exact positioning of MARMOX Shower Slope and marking of the drainage on the floor.
03. Preparing the sewage connection, positioning and connecting the siphon to the drain. Careful check of the slope and of the tightness of the sewage connection.
04. Create and check the horizontal and loadbearing subfloor.
05. Checking the exact positioning by a test-fitting of MARMOX Shower Slope, followed by fixing the siphon including the sealing.
06. Apply the adhesive to the full surfaces of both the subfloor and the reverse side of the MARMOX Shower Slope.
07. Gluing of MARMOX Shower Slope without hollow gaps, checking the exactly horizontal installation.
08. Tightly connecting the frame to the siphon by screwing.
09. Place weight on MARMOX Shower Slope, e.g. using tile packages until the adhesive is hardened.
10. After the adhesive is hardened, the waterproof fleece is glued in order to seal the joints. We also recommend a professional waterproofing of the walls in the shower area.
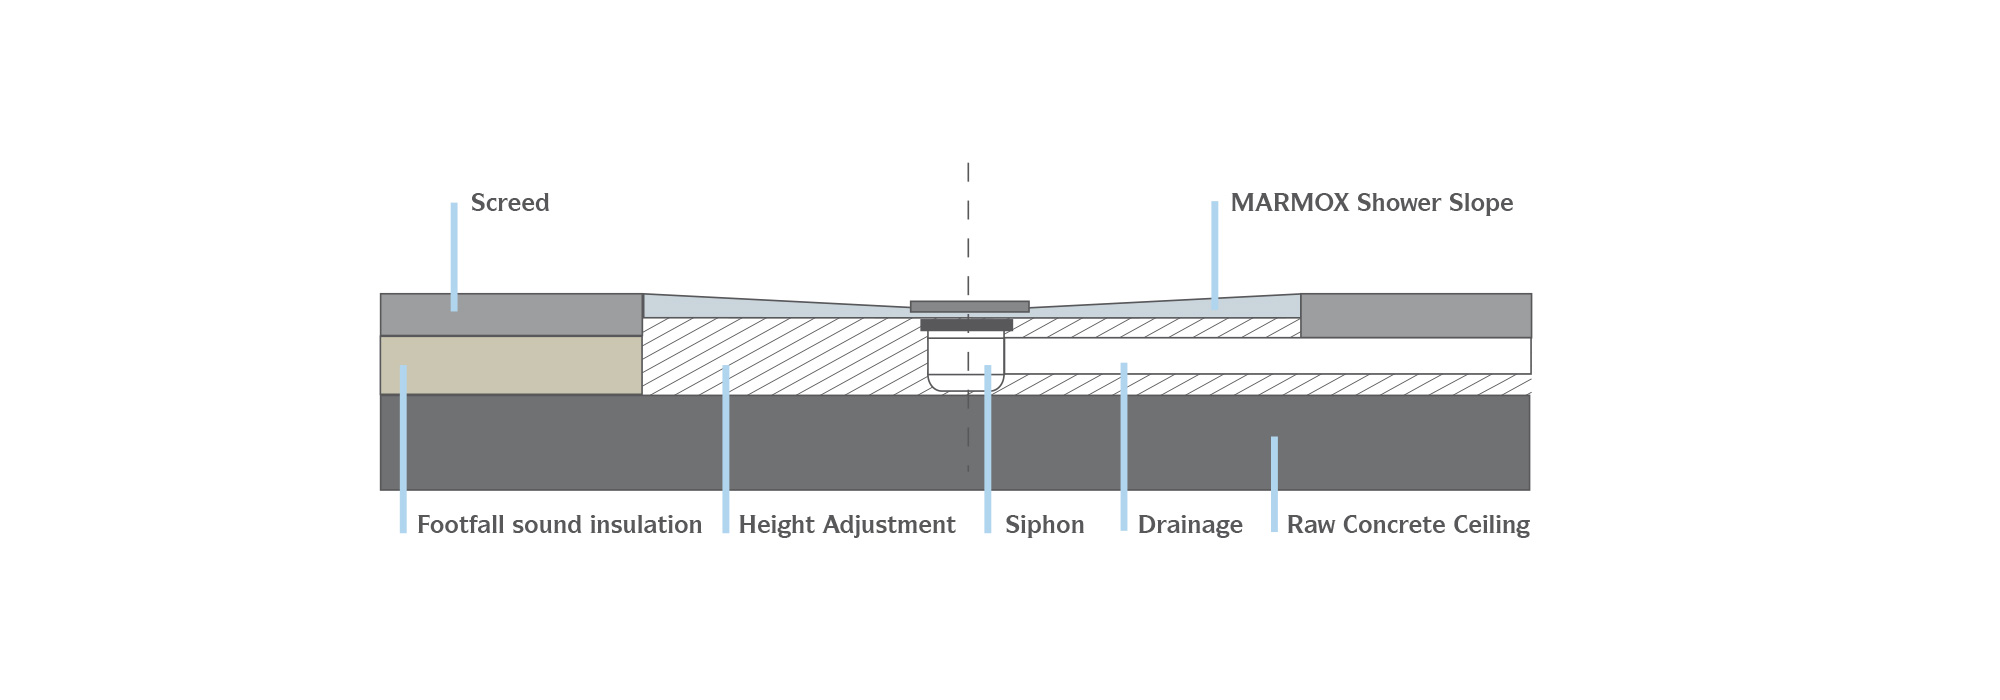
Installation on concrete floors
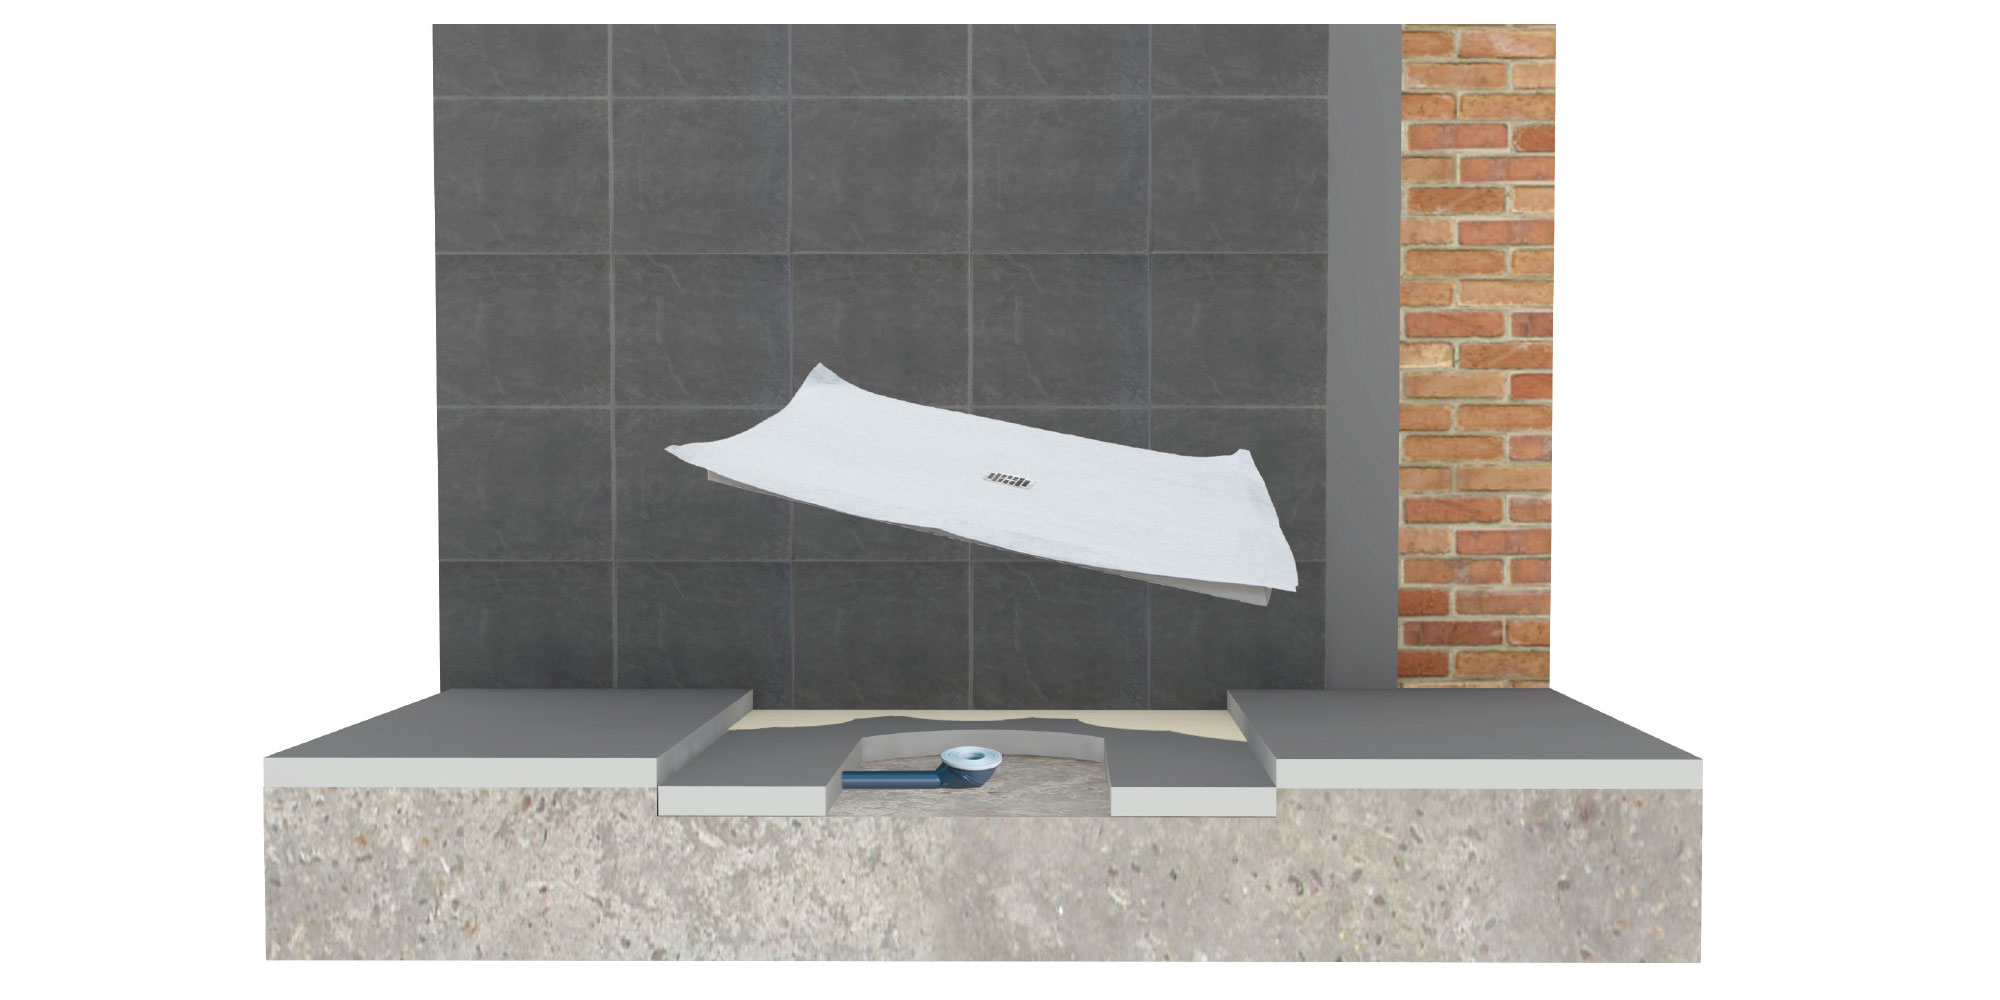
01. A successful installation requires a clean surface that is free from dust, grease, loose coatings and other impurities.
MARMOX Shower Slope can either be installed on the existing screed floor or integrated into the flooring structure, creating a flush and barrier-free surface.
Please note that an eventual change of statics in the flooring structure may require a new static test.
02. Positional Requirement: Removal of the existing screed.
03. Exact positioning of MARMOX Shower Slope and marking of the drainage on the floor.
04. Preparing the sewage connection, positioning and connecting the siphon to the drain. Careful check of the slope and of the tightness of the sewage connection.
05. Positional Requirement: creation of a loadbearing height adjustment, e.g. by using MARMOX Board construction boards that are glued with a polymer modified cementitious flexible adhesive.
Alternatively, screed can also be built in.
06. Checking the exact positioning by a test-fitting of MARMOX Shower Slope, followed by fixing the siphon including the sealing.
07. Apply the adhesive to the full surfaces of both the subfloor and the reverse side of the MARMOX Shower Slope.
08. Gluing of MARMOX Shower Slope without hollow gaps, checking the exactly horizontal installation.
09. Tightly connecting the frame to the siphon by screwing.
10. Place weight on MARMOX Shower Slope, e.g. using tile packages until the adhesive is hardened.
11. After the adhesive is hardened, the waterproof fleece is glued in order to seal the joints. We also recommend a professional waterproofing of the walls in the shower area