MARMOX Niches
Installation
MARMOX niches are suitable for installation in solid walls as well as suitable for stud walls.
In all cases, the flange must be firmly bonded all around it with a load-bearing substrate is necessary.
For this purpose, a studded wall may need to be used. If necessary, beams have to be installed.
Thanks to the factory-mounted sealing fleece, which overlaps by approx. 10 cm, it guarantees a secure seal of the surrounding joints.
Installation in solid walls
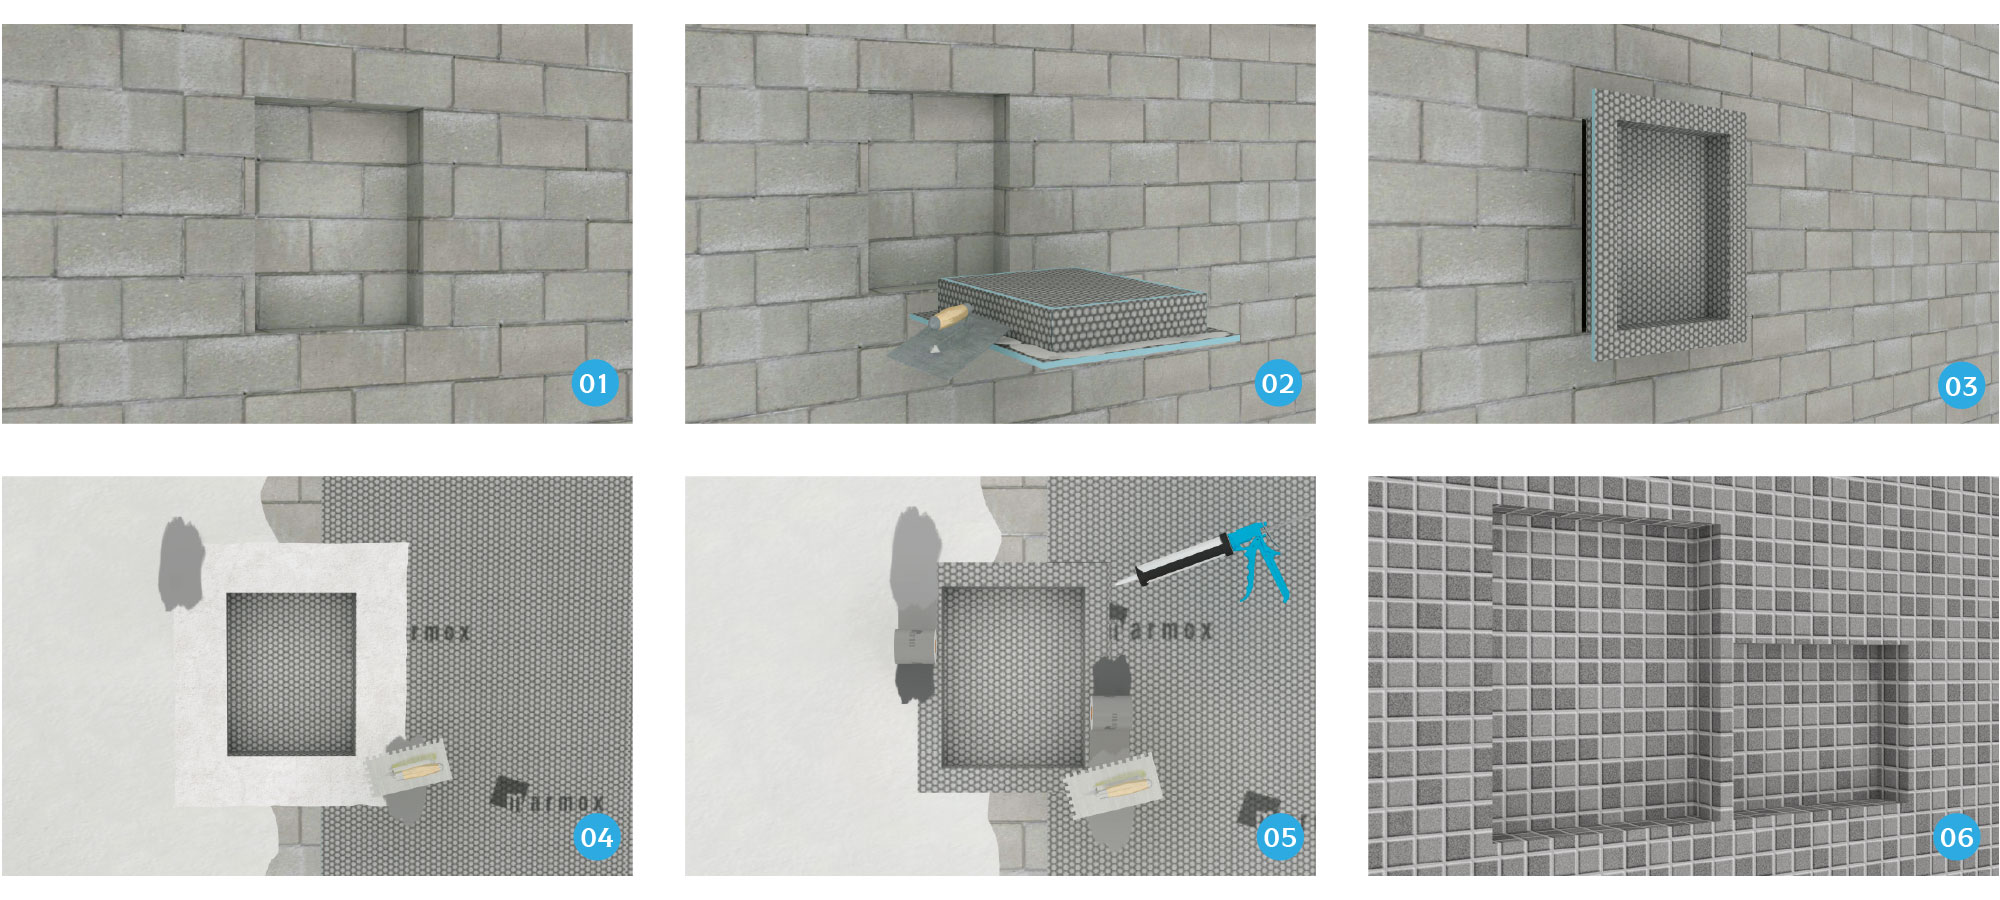
Work steps:
01. Exposing the installation space for the niche in the wall.
02. Apply the glue to the flange, if necessary fill the void between niche and the empty space in the wall and insert niche. Please make sure that the thickness of the flange corresponds to the thickness of the plaster or building panels.
03.Inserting and aligning the niche.
04. For niches with fleece:
All-round embedding of the fleece with sealing slurry.
05. For niches without fleece:
Gluing the joints and embedding of the waterproofing fleece with water-proofing slurry.
06. Tiling.
Vertical installation of narrow niches (20/40 and 30/40) in stud walls

Work steps:
01. Cutting out the building board in the designated area. Make sure that the stud frame partly for the gluing of the niche is free.
02. Apply adhesive.
03. Fitting and fixing.
04. For niches with fleece:
All-round embedding of the fleece with sealing slurry.
05. For niches without fleece:
Gluing the joints and embedding of the waterproofing fleece with water-proofing slurry.
06. Tiling.
Horizontal installation of wide niches (40/40 and 40/50) in stud walls
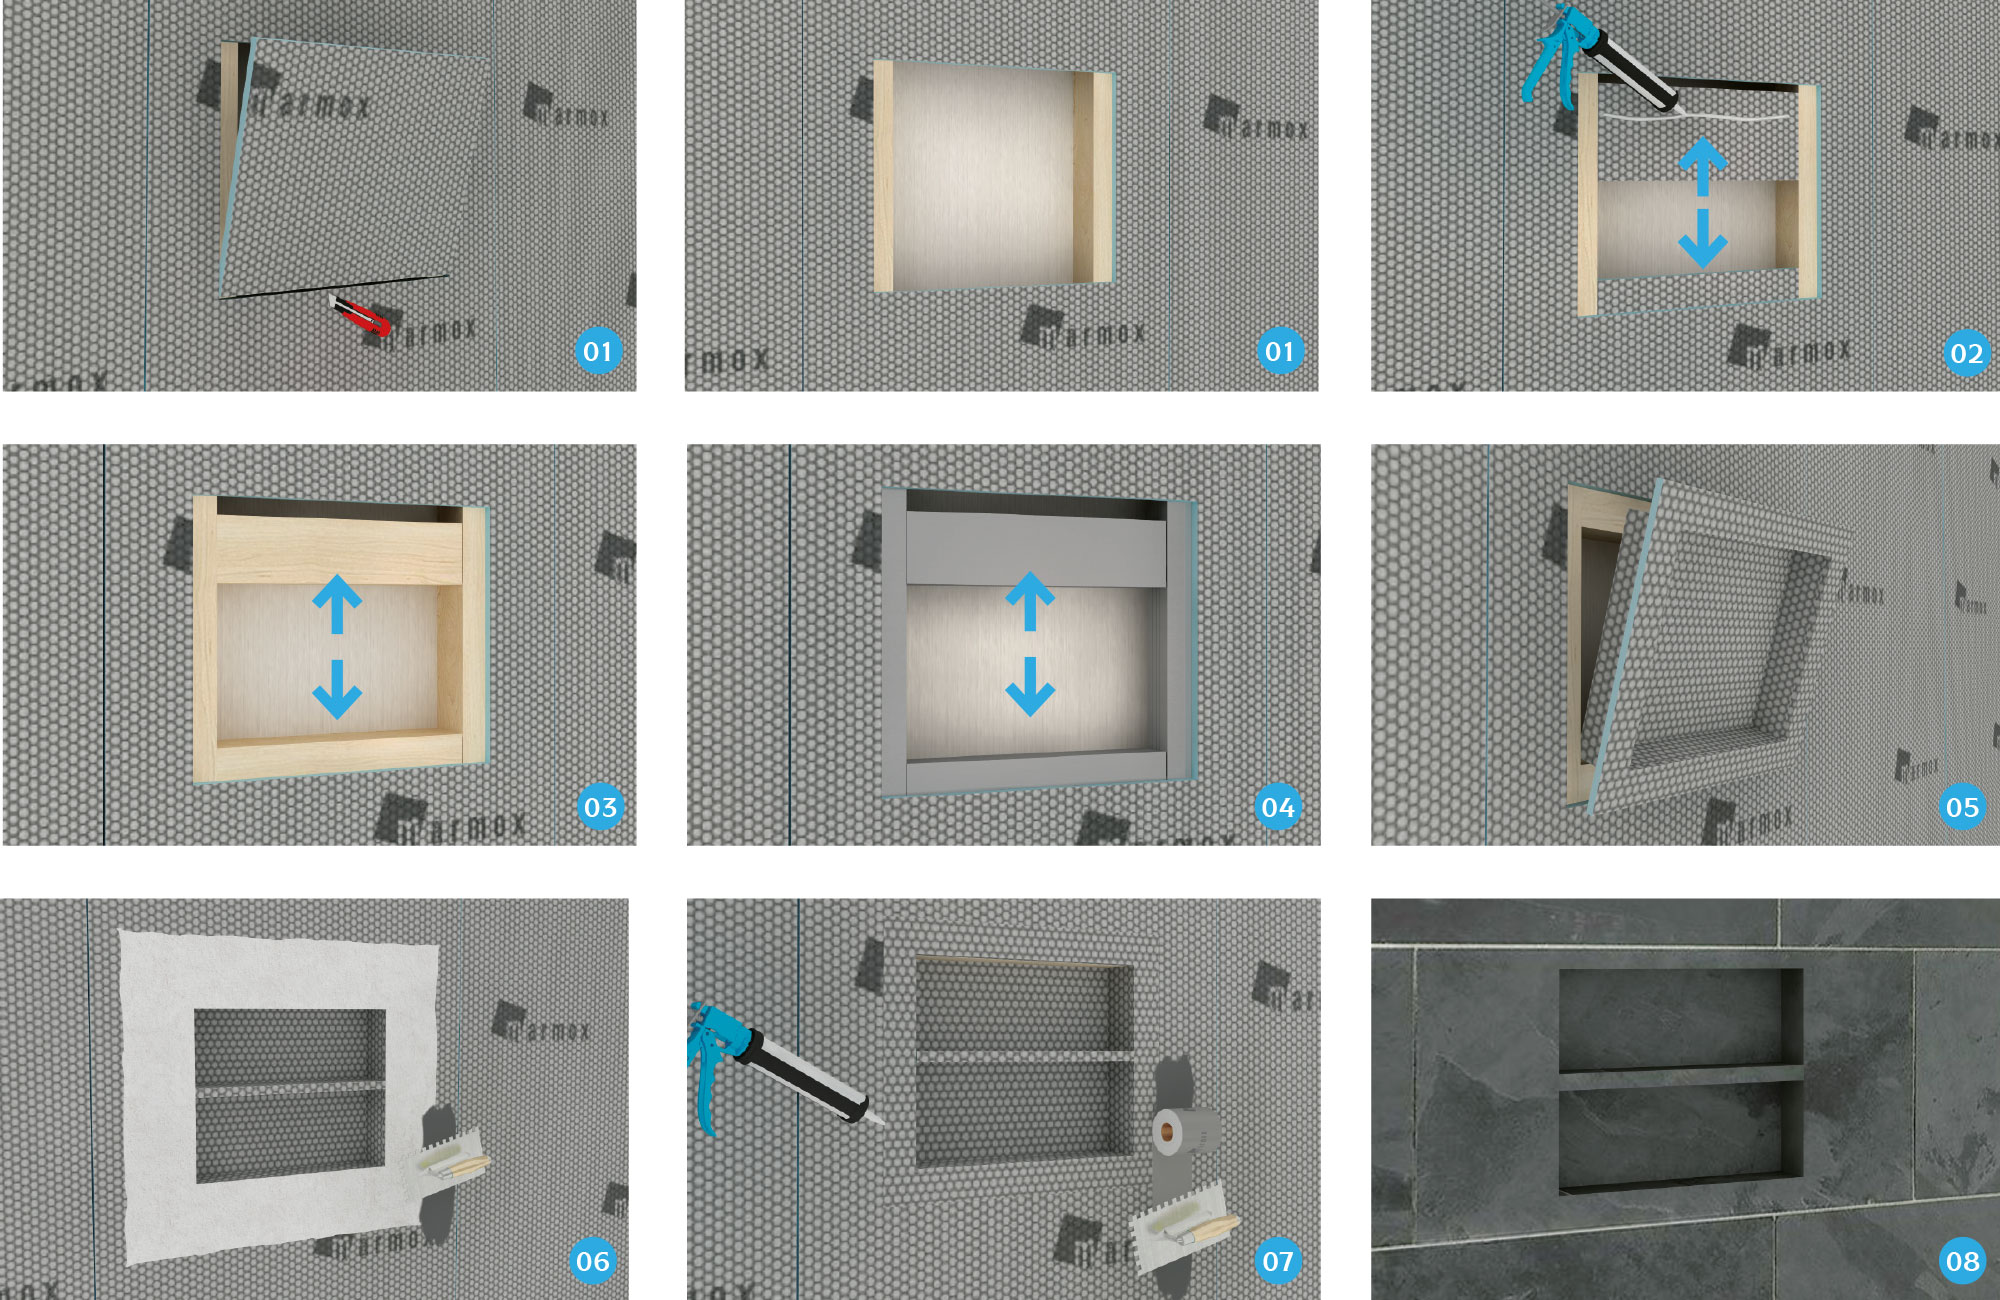
Work steps:
01. Cutting out the building board in the designated area. Thereby make sure that the stud frame partly for the gluing of the niche is free.
02. Adapting and gluing in a horizontal stop at the upper and lower edge of the cutout consisting of a MARMOX BOARD building board.
03. Adapting and gluing in a horizontal fence from the wood-stands on the upper and lower edge of the cutout.
04. Adapting and gluing in a horizontal stop of the metal-stands on the upper and lower edge of the cutout
05. Fitting, 1-component polyurethane or MS-Apply polymer adhesive, the niche align and fix.
06. For niches with fleece:
Embedding the fleece all around with sealing slurries.
07. For niches without fleece:
Gluing the joints and embedding of the waterproofing fleece with water-proofing slurry.
08. Tiling.