MARMOX Board PRO / ULTRA -
Installation
MARMOX Board PRO / ULTRA is suitable for installation on walls and floors.
MARMOX Board PRO / ULTRA is very easy to install on floors provided that the underground is prepared to be flat, rigid and clean. A complete embedding of the boards without hollow spaces is required if the boards are used on floors. The boards should be installed in a staggered pattern. An additional mechanical fixing of the boards is possible and we recommend use of 5 nails/screws per m².
MARMOX Board PRO / ULTRA is suitable for installation on metal and timber frame walls as well as on brick and concrete walls. It is preferable to install the long side of the board vertically in a staggered pattern. The fastening can be done using screws and/or glue, either applied complete or partial. All available thicknesses of MARMOX Board PRO / ULTRA are suitable for wall application. Boards of 4 mm and 6 mm thickness need to be glued completely without hollows on a stable substrate.
Installation of accessories
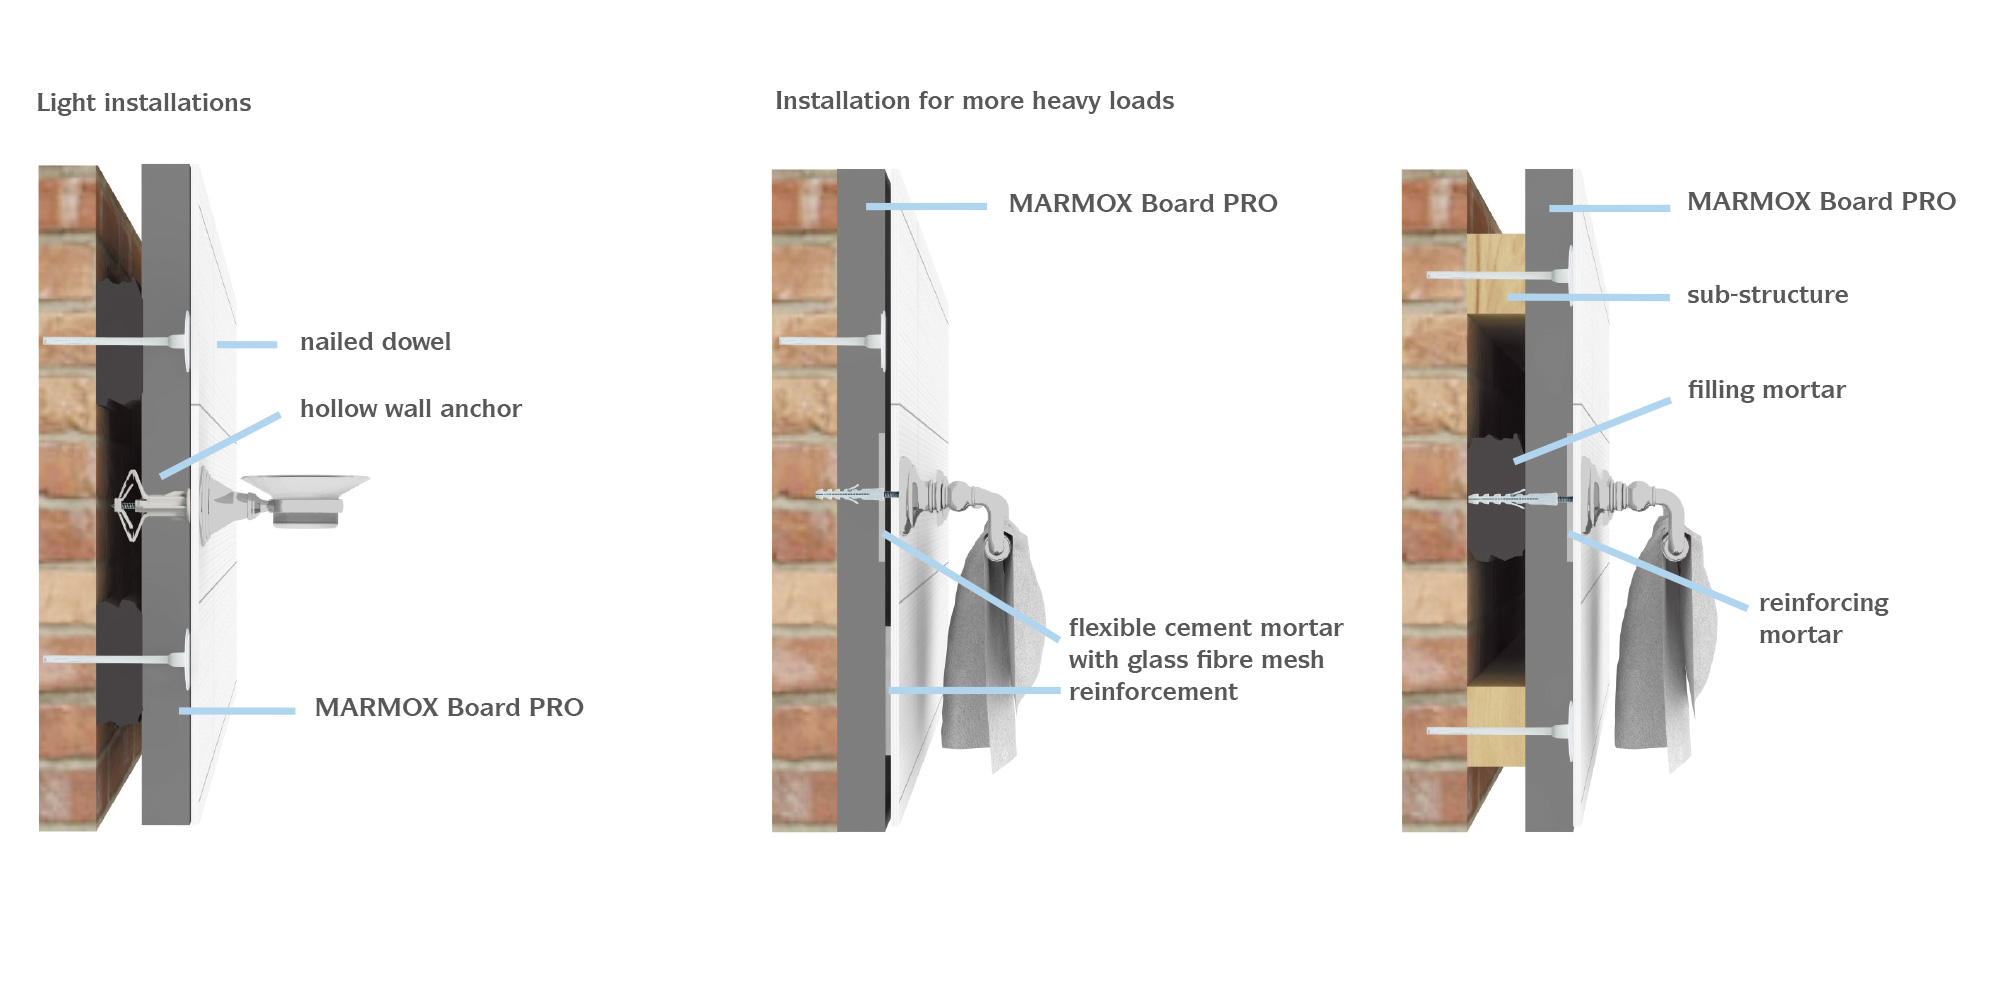
Exemplary installation of dowels:
![]() Installation for light weight with hollow wall anchor (e.g. soap dish)
Installation for light weight with hollow wall anchor (e.g. soap dish)
![]() Installation for more heavy loads (e.g. towel rail)
Installation for more heavy loads (e.g. towel rail)
Installation on floors
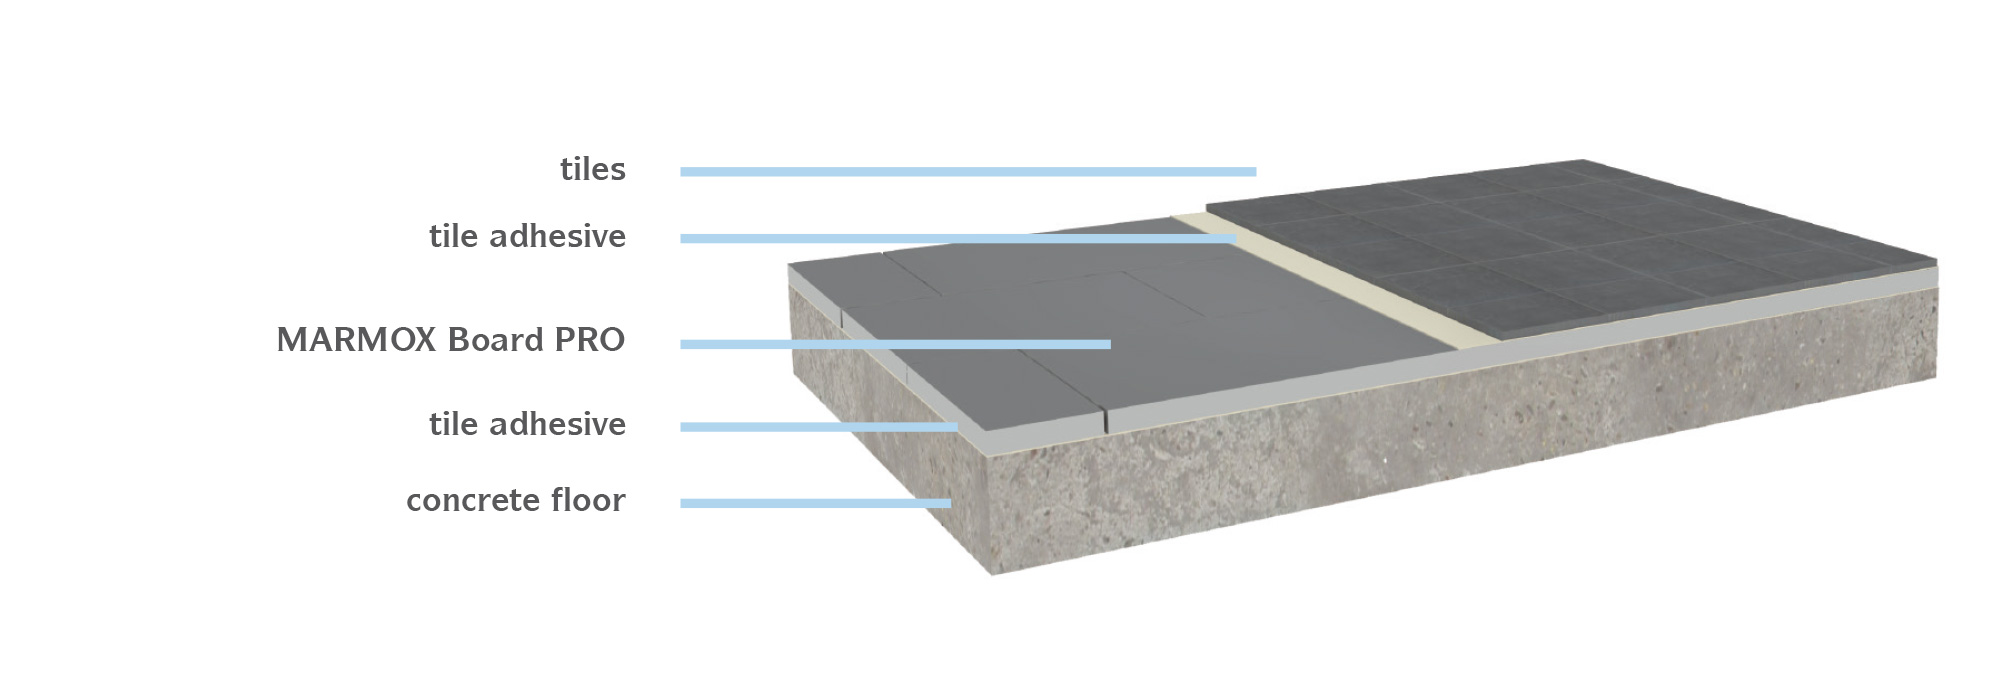
General steps for the installation of MARMOX Board PRO / ULTRA on concrete floors
01. The substrate should be levelled, oil and dust free, dry and stable. If necessary, a primer can be applied.
02. We recommend using a flexible cement-based tile adhesive, combed out with a 10 mm trowel, creating a ribbed adhesive bed. The boards have to be fully bedded to ensure no void under them.
03. Align the boards vertically and horizontally in a staggered pattern.
04. When the adhesive is cured, apply the glass fibre mesh to the joints, embedded into flexible tile adhesive.
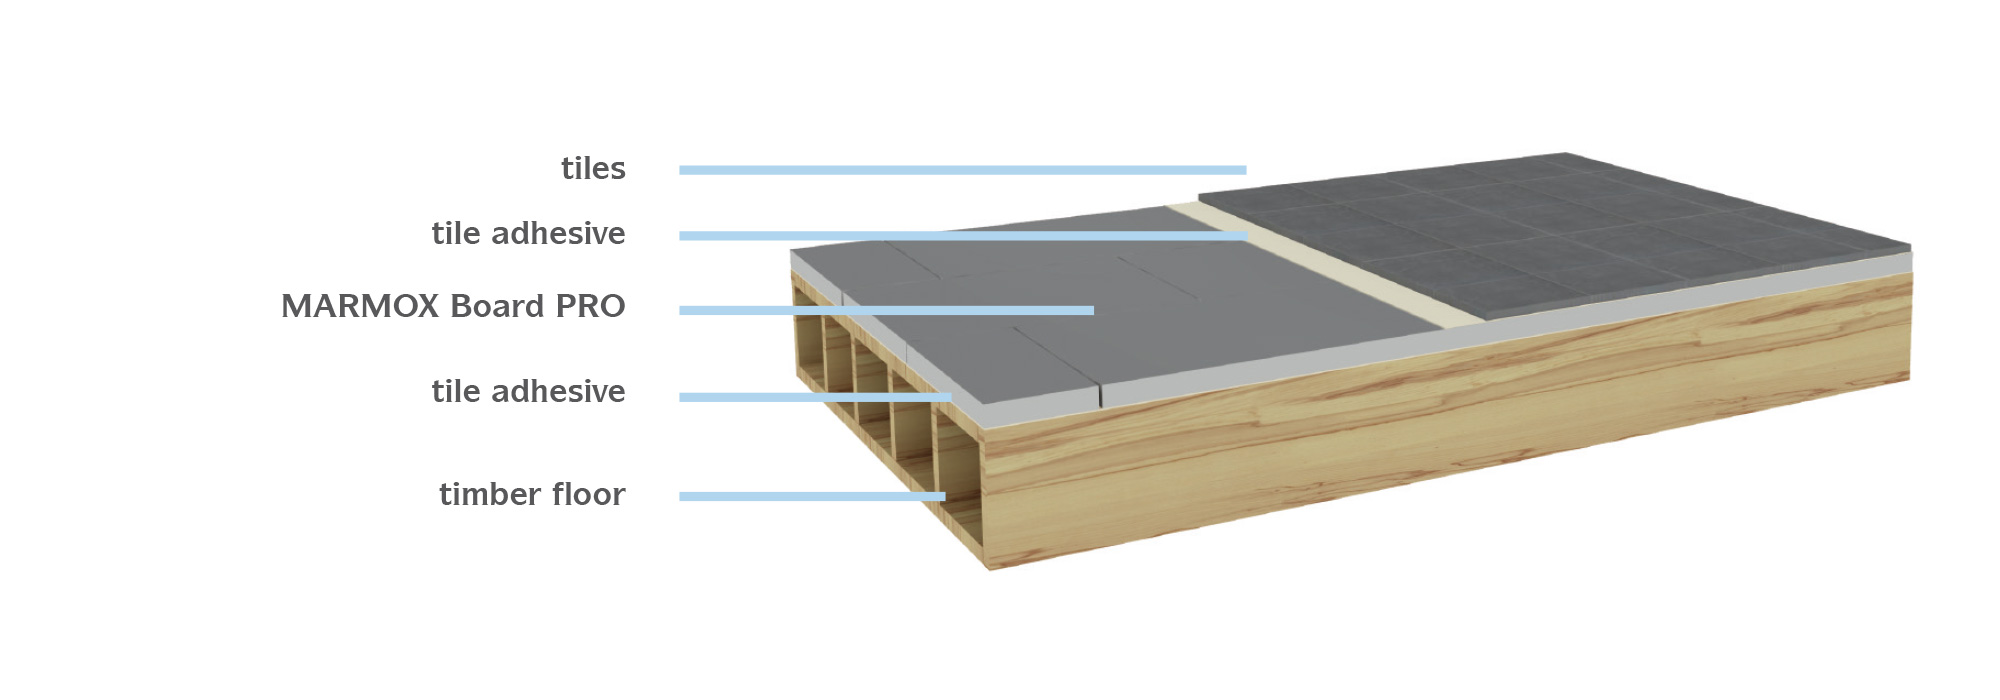
Installation of MARMOX Board PRO / ULTRA on timber floors
01. All MARMOX Board PRO / ULTRA with a minimum thickness of 10 mm is suitable to be used on timber floors.
02. Timber floors must be dry, rigid, checked for flatness, oil and dust free.
03. The floor must be primed according to the manufacturers’ instructions before the flexible cement adhesive can be applied with a notched trowel. The boards have to be laid in a staggered pattern, fully bedded to ensure no voids under the boards.
04. When the adhesive is cured, apply fibre glass tape to the joints, embedded into flexible tile adhesive.
05. After the flexible tile adhesive has dried, secure the boards with screws or nails and washers at the rate of 5 fixings per sqm, close to the sides and in the middle of the boards.
06. The floor is now prepared for the intended use.
Remark: Please consider the official regulations regarding waterproofing systems, if required. An additional sealing system might be required.
Installation on walls
MARMOX Board PRO / ULTRA on metal and timber frame walls
All MARMOX Board PRO with a minimum thickness of 10 mm is suitable for the installation of frame walls. We recommend considering a studs distance of 300 mm if MARMOX Board PRO with 10 mm or 12.5 mm will be used.
A studs distance of 600 mm is recommended if boards with 20 mm thickness or more are used.
Use galvanised or stainless steel or self-cutting screws with washers. The screws should be at least 20 mm longer than the boards’ thickness.
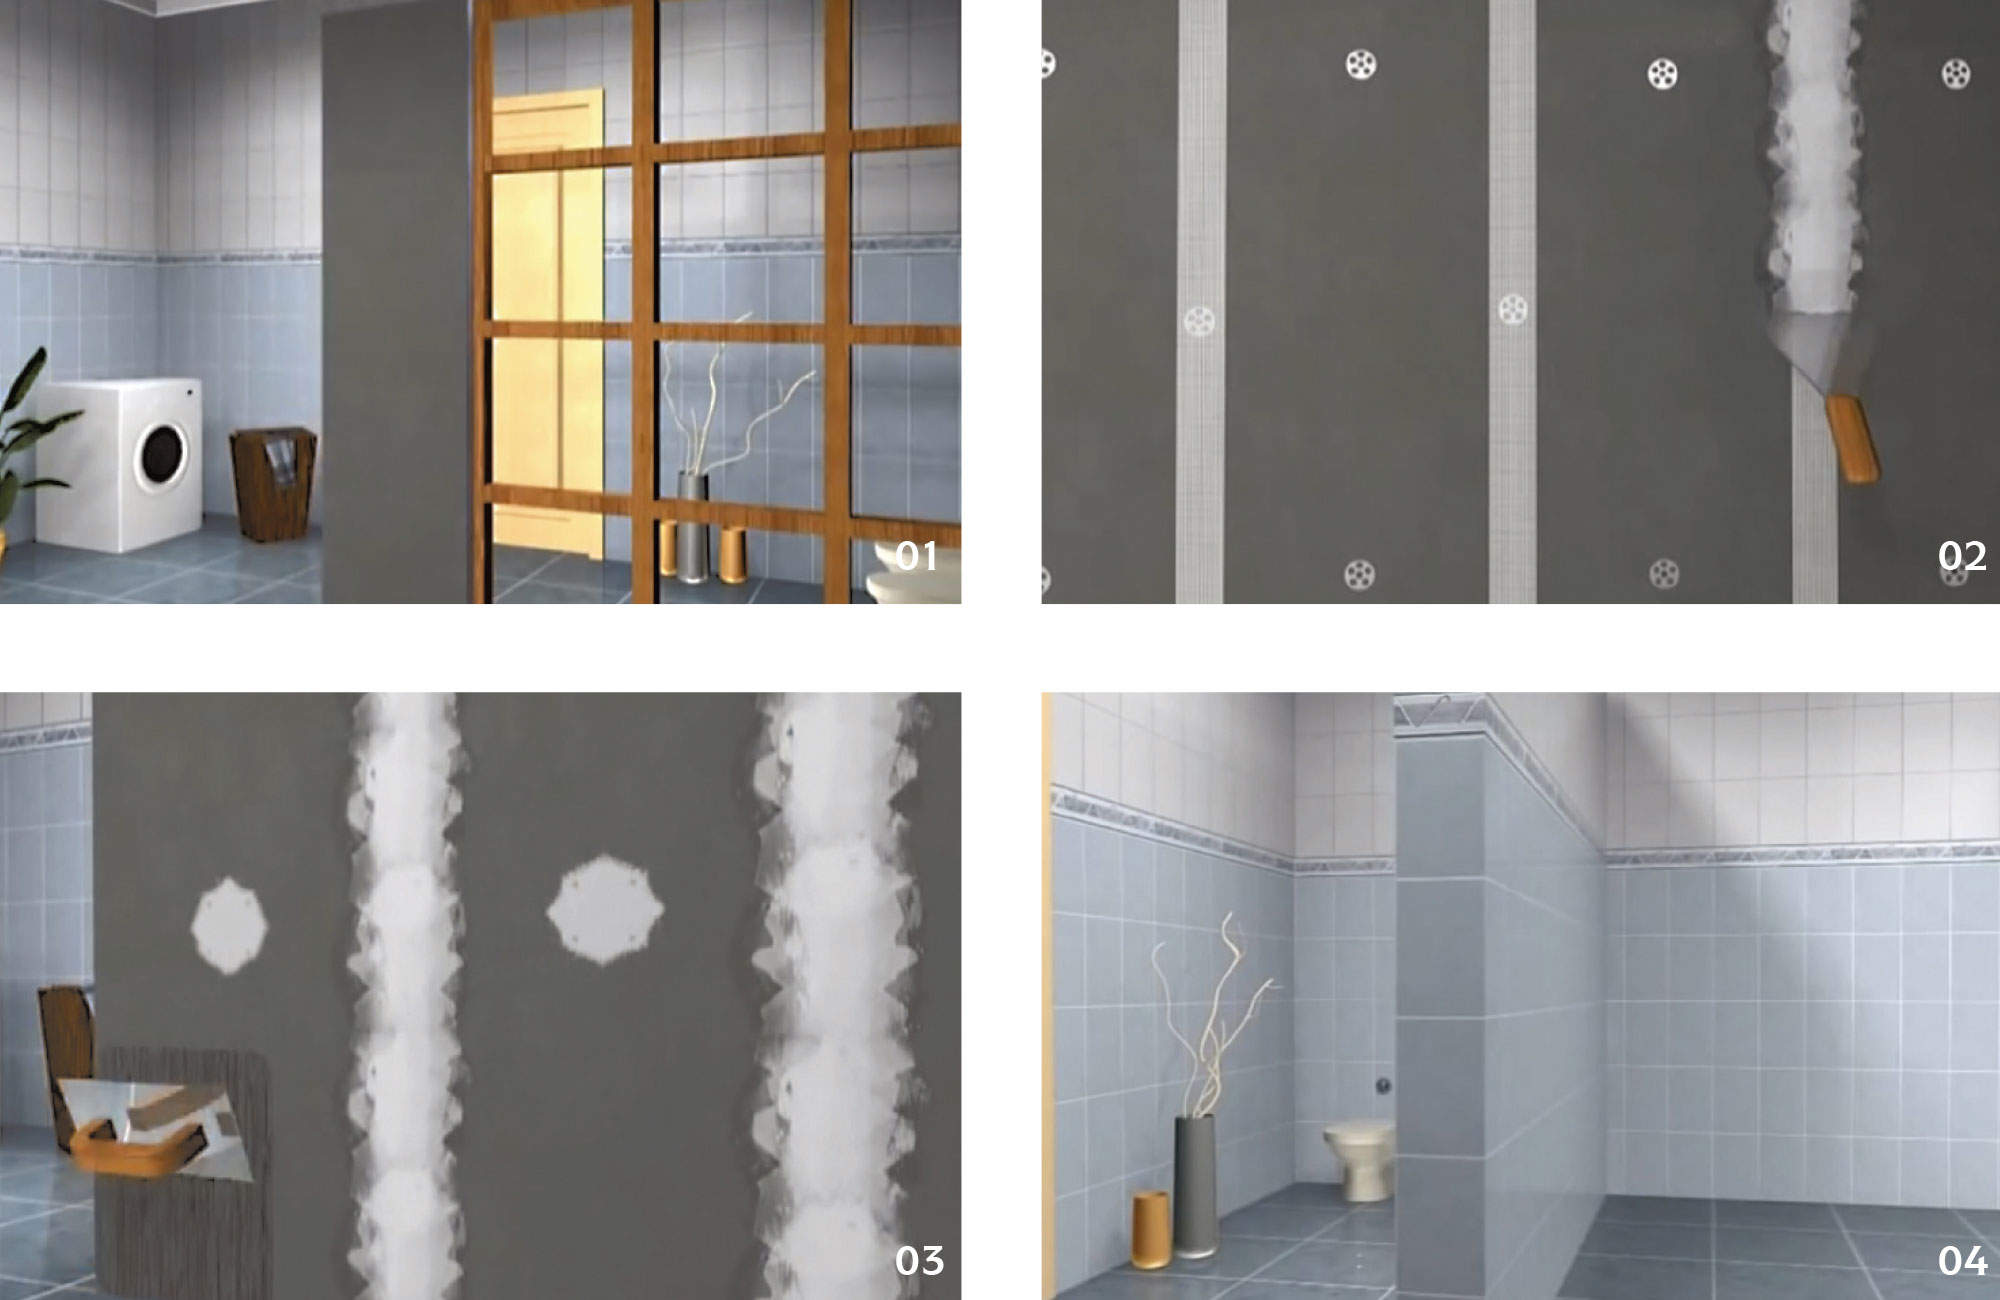
Working steps:
01. Frame walls
02. Fixing with screws and covering of joints with glass fibre mesh or sealing tape, embedded in a layer of flexible tile adhesive.
03. Once the adhesive has cured, tiles can be fixed and grouted.
04. Ready to use.
MARMOX Board PRO / ULTRA on brick or concrete walls
For even, clean and sound walls, use flexible tile adhesive combed out with a notched trowel. Then the boards are thoroughly bedded in a staggered pattern and aligned vertically and horizontally.
An additional mechanical fixing with a rate of 5 screws per sqm is recommended if the wall surface bonding capacity is weak and does not allow strong bonding. Cover all joints with glass fibre mesh or sealing tape, embedded in a layer of flexible tile adhesive.
For uneven walls use Boards with 20 mm thickness or more. Drill the boards at the place of dowels at the rate of 5 dowels per sqm. Place dabs of tile adhesive on the holes. The boards have to be laid in a staggered pattern, aligned vertically and horizontally.
Once the tile adhesive has cured, drill the board through the holes into the wall and insert dowels, washers and screws/nails. Cover all joints with glass fibre mesh or sealing tape, embedded in a layer of flexible tile adhesive.
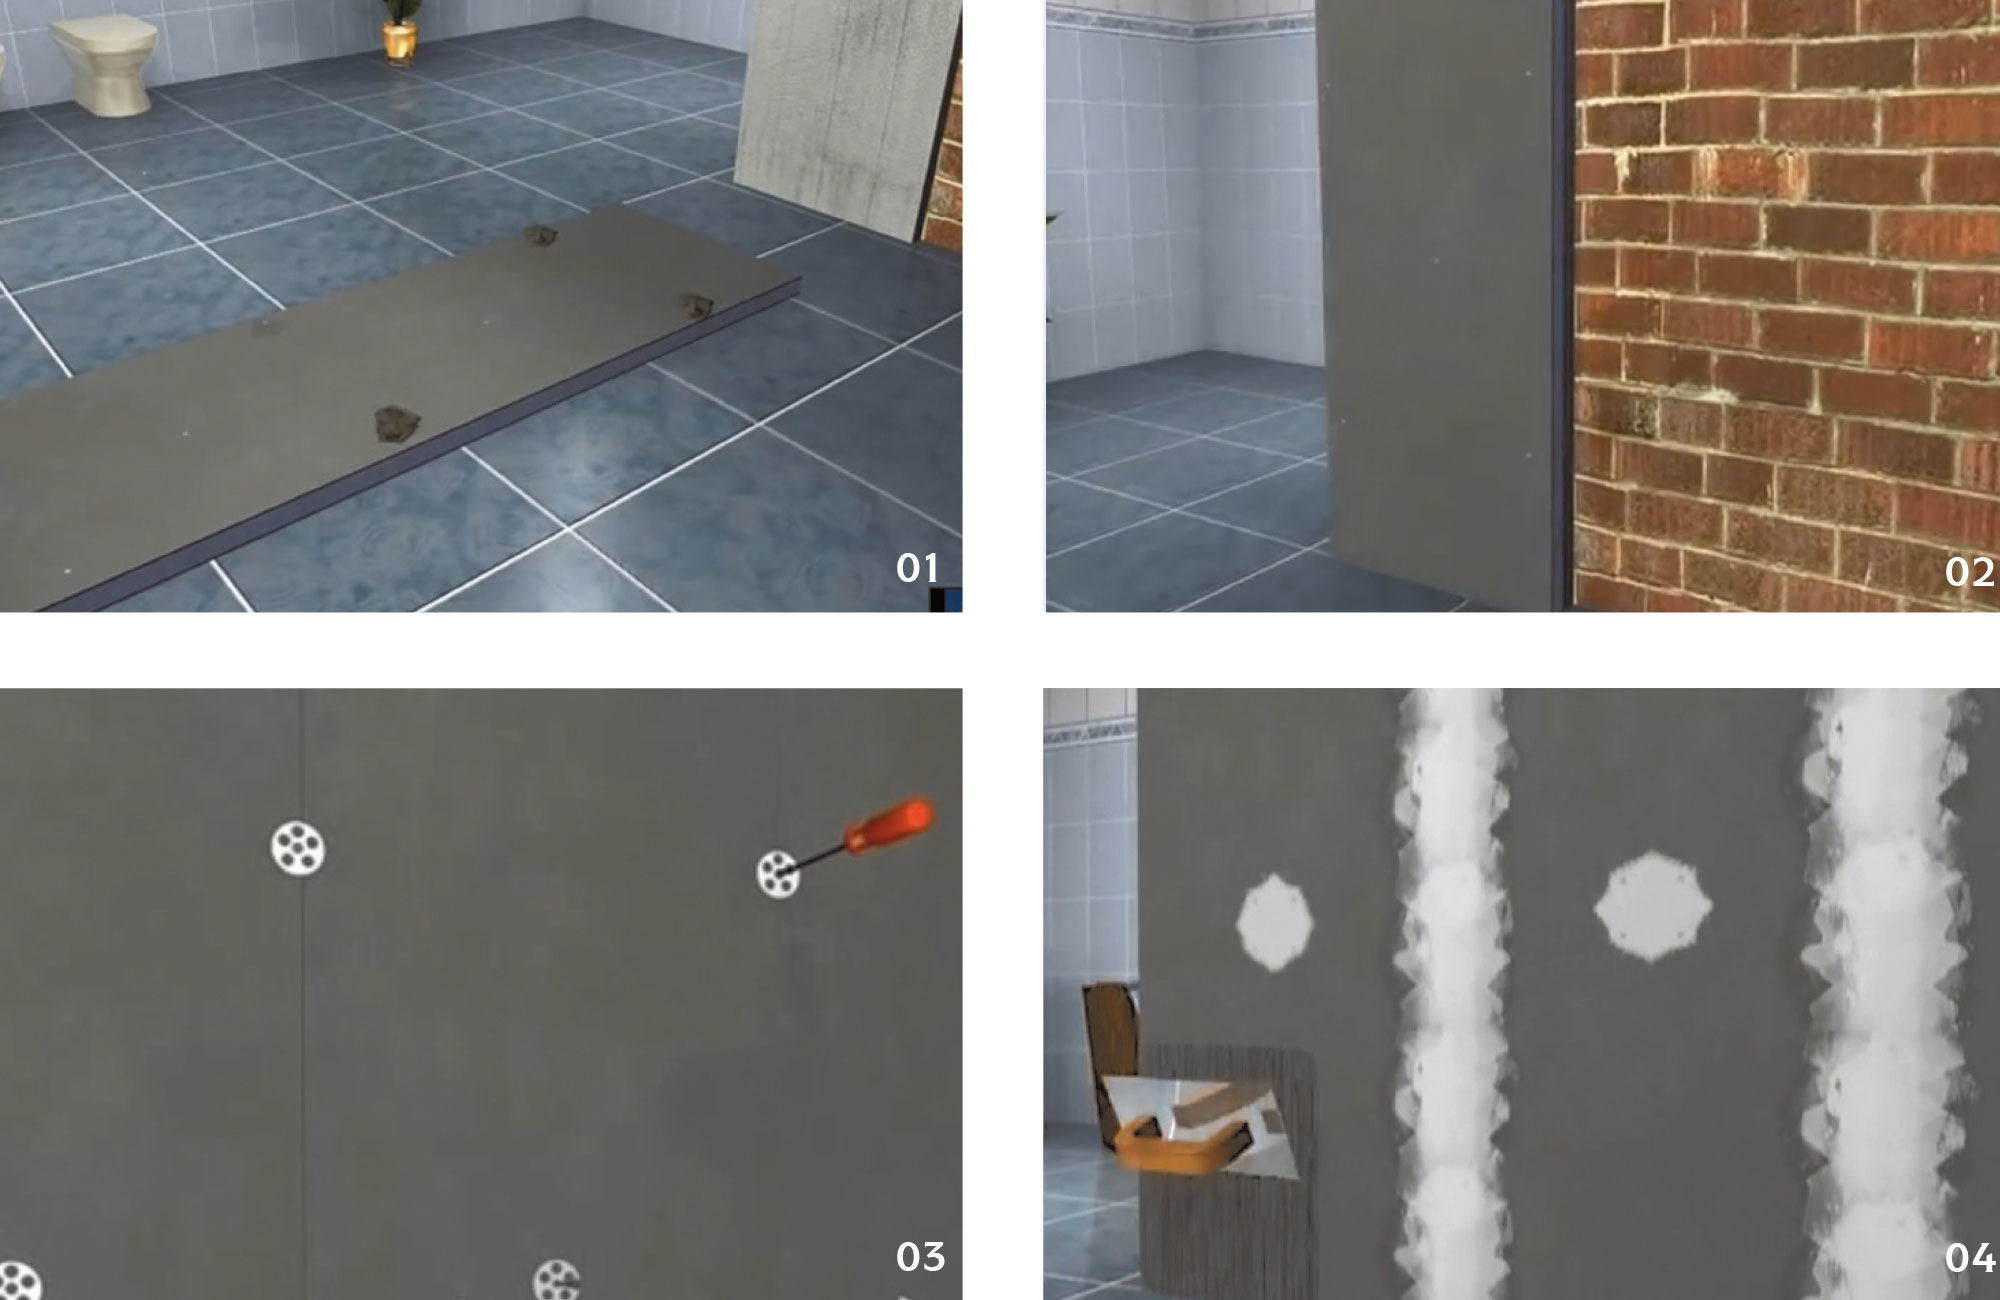
Installation steps:
01. Drill 5 holes per m² at the fixing points of boards, place dabs at the position of the holes on the back side of the boards.
02. Align the boards vertically and horizontally in the right place.
03. Drill through the holes in the boards into the wall, insert dowels and arrange the fixing with screws/nails.
04. Cover all joints with glass fibre mesh or sealing tape, embedded in a layer of flexible tile adhesive.
Remark: Please consider official regulations regarding waterproofing systems, if required. An additional sealing system might be required.